I probably should have done this post first, because what you do here can be used in the previous hack using these rainbow files. Using Ophcrack, you can crack account password of almost all the Windows operating systems currently used in industry (i have not tested this on Windows8, but i assume it would work as long as they don't use "draw your password" feature) and since OphCrack is the fastest password cracking tool, it wont take more than 30 minutes to crack a password. So let's begin:
What Do You Need ?
BackTrack 5 Live DVD/USB.
Rainbow Files (i'll tell you what it is.)
Physical Access to victim PC.
So What-The-Hell is Rainbow Files ?
First thing that pops in mind when reading rainbow files is the collection of rainbows and unicorns flying(sarcasm), but no, rainbow files/tables are basically huge sets of precomputed tables filled with hash values that are pre-matched to possible plaintext passwords. The rainbow tables essentially allow hackers to reverse the hashing function to determine what the plaintext password might be. It's possible for two different passwords to result in the same hash so it's not important to find out what the original password was, just as long as it has the same hash. The plaintext password may not even be the same password that was created by the user, but as long as the hash is matched, then it doesn't matter what the original password was.
So What Do I Need To Do ?
You need to download the rainbow tables matching to the OS version of your victim PC. Get them Here.You can download the smaller files because they will work,unless your victim uses 28+ key long password.
NOTE: the vista files will work for Windows 7 and Windows 8 too.
Everything is Downloaded and ready, now put the downloaded rainbow tables on a flash drive.
Let's begin;
Step 1:
Boot the victim PC with BackTrack Live DVD. remember to start the GUI (startx)
Step 2:
Now navigate to the directory where windows password files are stored.
usually: WINDOWS/system32/config/
Step 3:
Locate the Files "SAM" and "System", and copy them to a new folder on the desktop of Backtrack
Step 4:
Run the OphCrack tool in backtrack by : start->Backtrack->Privilege Escalation->Password Attack->Offline Attacks->Ophcrack GUI.
Step 5:
Go to "Load" and select "Encrypted SAM" in ophcrack tool. Now it will ask you to select directory that contains SAM folder. Select the directory where you saved the SAM file (new folder on desktop).
Step 6:
Target the Administrator account, remove other account off the list (if any).
Step 7:
Plug in the pen-drive/flash drive, extract the rainbow tables to desktop.
Step 8:
Click on the "Table" button in ophcrack tool. Now it will ask you to select the table. Select the files as required.Click OK after that.
Step 9:
Now hit the "Crack" button, and wait a few minutes, you should have the key. reboot the windows machine into windows and test.
Tuesday, March 12, 2013

Wednesday, February 27, 2013
LAN Hacking
I'm posting this hack first because its easy to do, and it will get your feet wet as to what can be done with the right tools and enough patience. the goal for this hack is to show you what kind of damage an attacker who gains access to your LAN environment can do if left to his/her own devices. the major tool i will use is Metasploit, bu ti will simplify this for you because this is your first time hacking into anything, so i'm also using ARMITAGE. Armitage is an GUI Platform for Metaspoilt and in technical terms,it is a script-able red team collaboration tool for Metasploit that visualizes targets, recommends exploits, and exposes the advanced post-exploitation features in the framework.It saves time and is very powerful in commencing Metaspoilt attacks.
So Now about our attack:
What we need:
Latest Metasploit framework.
Java
Preferably Internet on LAN
Brains and patience.
Now lets us start our hack:
Step 1: Open armitage on Backtrack 5 by going to : Backtrack > Exploitation Tools > Network Exploitation Tools > Metasploit Framework > armitage.
Step 2: Connect Armitage:
Click on the connect button.
Step 3: Connecting Armitage :
Now use the patience part, and stretch your legs, it takes some time to connect.
Step 4: Armitage Window :
It has 3 Panels:
Target Panel
Module Panel
Tabs Panel
Step 5: Finding the alive host on the network :
Now you will search for Host on you network, by going to hosts -> Nmap Scan -> Quick Scan (OS detect). This will perform a quick scan to detect the host and their operating systems and vulnerabilities.
Step 6: Inputting The Scan Range :
Now You have to insert scan range,that is you LAN ip range, most preferably it would start with 192.168.0.- or 10.0.0.-.
NOTE : the ( - ) resembles the computers on LAN.
Start the scan.
Step 7: Scan complete: After the scan has completed, if their are any other PC's on your network on, then they would be visible in the Target Pane (the big black box on the upper right).
Step 8: Finding Attacks :
Now the fun parts starts. Click on "Attacks" tab in your toolbar and select 'find attacks' (Not hail mary, you might not be ready for that). Start the scan and wait till it completes.
Step 9: Set the vulnerability :
Right click on the 'host' icon (windows pc) -> Select attacks -> smb -> ms08_067_netapi vulnerability.
Now a window should pop, click on the check-box that says "Use a reverse connection", start attack
Step 10: The final result :
So did the host icon turn red? That means YOU PASSED.
So you did the hacking part right, now let us mess with the client.
Hack 1: Opening Command Prompt:
Right click on the host -> Meterpreter1 ->Interact -> Command Shell
Now you are in their command prompt. You can now change, rename, delete, create files on their pc now. Search Google for some powerful windows commands.
Hack 2: Start an KEYLOGGER:
Click on the Meterpreter2 -> Explore -> Log Keystrokes.
Now you will receive what the victim is typing.
Hack 3: Take a Screen Shot:
Click on the Meterpreter2 -> Explore ->Screenshot.
Now you can see what is on their Facebook wall or Google mail accounts.
Hack 4: Browse Files:
Right click -> Meterpreter2 -> Explore > Browse Files .
Now you can interact with all the files on victim PC via a GUI.
Hack 5: Get in His Webcam:
Right click -> Meterpreter2 ->Explore -> Webcam shot
If they have a webcam installed, this will stream to you what the camera sees.
This will get you started. Please try and do your own discovery, and research as much as possible. The habit of self discovery can fetch you far more knowledge than someone holding your hand and showing you the say.
Happy Hacking!
So Now about our attack:
What we need:
Latest Metasploit framework.
Java
Preferably Internet on LAN
Brains and patience.
Now lets us start our hack:
Step 1: Open armitage on Backtrack 5 by going to : Backtrack > Exploitation Tools > Network Exploitation Tools > Metasploit Framework > armitage.
Step 2: Connect Armitage:
Click on the connect button.
Step 3: Connecting Armitage :
Now use the patience part, and stretch your legs, it takes some time to connect.
Step 4: Armitage Window :
It has 3 Panels:
Target Panel
Module Panel
Tabs Panel
Step 5: Finding the alive host on the network :
Now you will search for Host on you network, by going to hosts -> Nmap Scan -> Quick Scan (OS detect). This will perform a quick scan to detect the host and their operating systems and vulnerabilities.
Step 6: Inputting The Scan Range :
Now You have to insert scan range,that is you LAN ip range, most preferably it would start with 192.168.0.- or 10.0.0.-.
NOTE : the ( - ) resembles the computers on LAN.
Start the scan.
Step 7: Scan complete: After the scan has completed, if their are any other PC's on your network on, then they would be visible in the Target Pane (the big black box on the upper right).
Step 8: Finding Attacks :
Now the fun parts starts. Click on "Attacks" tab in your toolbar and select 'find attacks' (Not hail mary, you might not be ready for that). Start the scan and wait till it completes.
Step 9: Set the vulnerability :
Right click on the 'host' icon (windows pc) -> Select attacks -> smb -> ms08_067_netapi vulnerability.
Now a window should pop, click on the check-box that says "Use a reverse connection", start attack
Step 10: The final result :
So did the host icon turn red? That means YOU PASSED.
So you did the hacking part right, now let us mess with the client.
Hack 1: Opening Command Prompt:
Right click on the host -> Meterpreter1 ->Interact -> Command Shell
Now you are in their command prompt. You can now change, rename, delete, create files on their pc now. Search Google for some powerful windows commands.
Hack 2: Start an KEYLOGGER:
Click on the Meterpreter2 -> Explore -> Log Keystrokes.
Now you will receive what the victim is typing.
Hack 3: Take a Screen Shot:
Click on the Meterpreter2 -> Explore ->Screenshot.
Now you can see what is on their Facebook wall or Google mail accounts.
Hack 4: Browse Files:
Right click -> Meterpreter2 -> Explore > Browse Files .
Now you can interact with all the files on victim PC via a GUI.
Hack 5: Get in His Webcam:
Right click -> Meterpreter2 ->Explore -> Webcam shot
If they have a webcam installed, this will stream to you what the camera sees.
This will get you started. Please try and do your own discovery, and research as much as possible. The habit of self discovery can fetch you far more knowledge than someone holding your hand and showing you the say.
Happy Hacking!
Thursday, February 21, 2013
Top 9 penetration testing operating systems
Below is the list of Top 9 Operating Systems focused on Penetration and Hacking,The Operating Systems are judged on these Criteria : Number Of Package's, Availability of tutorials,how often new editions come out, popularity and user experience. I have personally used each of these tools, and i must say they do live up to their name and reputation.
One Operating System of note:
Damn Vulnerable Linux.
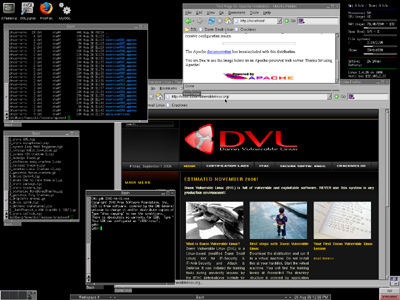
Well this is new, Damn Vulnerable Linux (DVL) is everything a good Linux distribution isn't; Its developers have spent hours stuffing it with broken, ill-configured, outdated, and exploitable software that makes it vulnerable to attacks. Based on Slackware, DVL isn't built to run on your desktop – it’s a learning tool for security students. So put it on your old PC and start your hacking carrier.
NOTE: This is not a distro full of security tools and how-to-hack apps. This is one of the best tools to use as a target to test your skills against. The people who developed this have sense discontinued the project, but you can still find ISO's and virtual images of this product for your own use.
NOTE: ITT Technical Institute students are given a copy of this on a virtual machine with their server farm structure for ISS classes. It is labeled as one of their Linux VM's
With that, here it is:
Number 9 : Samurai Web Testing Framework (WTF).
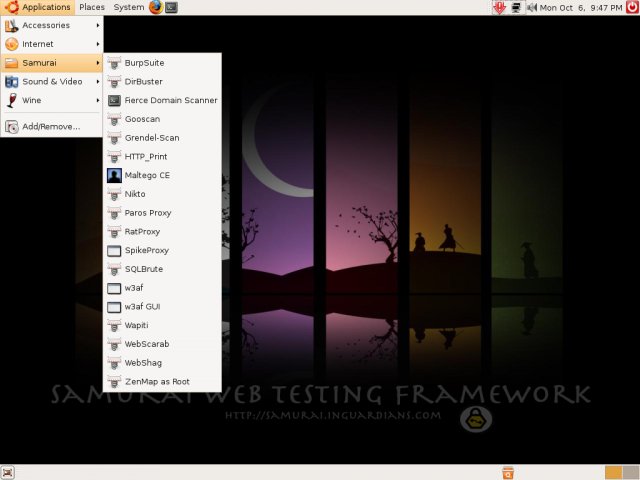
The Samurai Web Testing Framework is a live Linux environment that has been pre-configured to function as a web pen-testing environment. The CD contains the best of the open source and free tools that focus on testing and attacking websites. Developed by Kevin Johnson [security analyst] and Justin Searle [IT Security Architect for JetBlue Airways] specially for hacking web based application and websites. Bad thing it is only available as Live DVD, and its one of more difficult distro's to install. Interested ? then check out their page Here.
Number 8 : Back Box Linux.
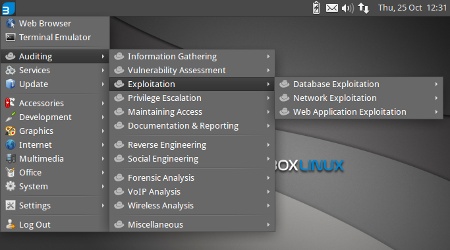
BackBox is a Linux distribution based on Ubuntu. It has been developed to perform penetration tests and security assessments. Designed to be fast, easy to use and provide a minimal yet complete desktop environment, its own software repositories, are always being updated to the latest stable version of the most used and best known ethical hacking tools. Check it out Here.
Number 7 : Gnacktrack :
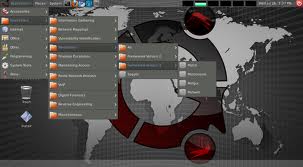
Ahh, gnackTrack is no-doubt the best looking Pentesting operating system ever,and this is the best for beginner hackers,it has a good software library,GnackTrack is a Live (and installable) Linux distribution based on Ubuntu.The latest version "GnackTrackR6" is gaining a lot of popularity and you should try it out if you are interested.Official Site Here.
Number 6 : Network Security Toolkit (NST).

The Network Security Toolkit (NST) is Based of Fedora (not debian ) and The main intent of developing this toolkit was to provide the network security administrator with a comprehensive set of Open Source Network Security Tools.This Distro has a whole new level of Graphical Interface and damm it looks good.Get this beautiful yet dangerous OS Here.
Number 5 : Live Hacking Operating System.

Live Hacking DVD is a Linux distribution packed with tools and utilities for ethical hacking, penetration testing and countermeasure verification. Based on Ubuntu this distribution comes in two forms. A full Linux desktop including a graphical user interface (GNOME) and tools and utilities..Another in live DVD form.Plus Point : This distro has a huge guide on hacking on its official site.Get this Distro Here
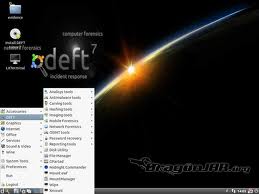
Number 4 :DEFT Digital Evidence & Forensic Toolkit.
.jpg)
DEFT 7 is based on the new Kernel 3 (Linux side) and the DART (Digital Advanced Response Toolkit) with the best freeware Windows Computer Forensic tools. It’s a new concept of Computer Forensic system that use LXDE as desktop environment.It is a very professional and stable system that includes an excellent hardware detection and the best free and open source applications dedicated to Incident Response, Cyber Intelligence and Computer Forensics.Get this Swiss Army Knife of the PC world Here
Number 3 : BlackBuntu Linux.
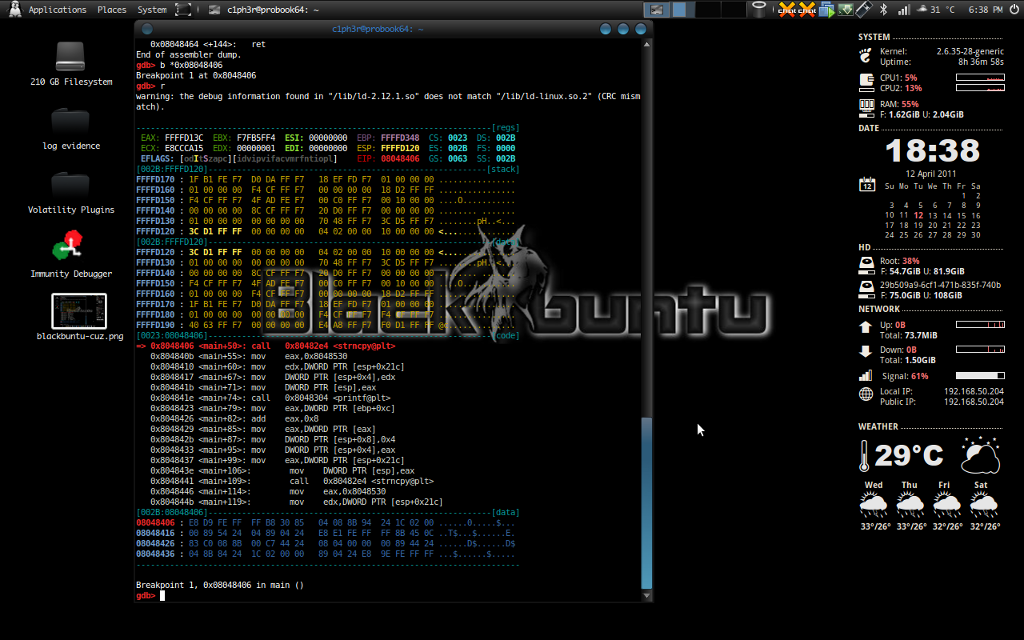
Blackbuntu is distribution for penetration testing which was specially designed for security training students and practitioners of information security. It's currently being built using the xubuntu 12.04.This edition has a large software library and nearly 100000's tutorials flying on YouTube and other sites. Blackbuntu runs on almost any PC,new or old,because of its less requirements.The Main developer,Krit Kadnok says "It's created in our own time as a hobby."Get Blackbuntu Here.
Number 2 : BugTraq Operating System.
 Bugtraq system offers the most comprehensive distribution, optimal, and stable with automated services manager in real time. Bugtraq is available with XFCE, Gnome and KDE based on Ubuntu, Debian and OpenSuse. The systems are available in 11 different languages. Bugtraq has the widest range of tools and a whole lot of tutorials on the net,besides that,This distro has a sick interface.Get this Here.
Number 1 : BackTrack Operating System.
.jpg)
BackTrack is an Operating system which is especially made for Hackers,ethical Hackers,Penetration testers etc.This operating system includes all the security assessments and features till date.This distro got it all,Slick Interface,Powerful yet latest tools,high compatibly large software library,tons of tutorial.you name it.This is used by FBI,NSA and most of the hackers.So why don't you try it ? Get Version 5r3 from Here.
One Operating System of note:
Damn Vulnerable Linux.
Well this is new, Damn Vulnerable Linux (DVL) is everything a good Linux distribution isn't; Its developers have spent hours stuffing it with broken, ill-configured, outdated, and exploitable software that makes it vulnerable to attacks. Based on Slackware, DVL isn't built to run on your desktop – it’s a learning tool for security students. So put it on your old PC and start your hacking carrier.
NOTE: This is not a distro full of security tools and how-to-hack apps. This is one of the best tools to use as a target to test your skills against. The people who developed this have sense discontinued the project, but you can still find ISO's and virtual images of this product for your own use.
NOTE: ITT Technical Institute students are given a copy of this on a virtual machine with their server farm structure for ISS classes. It is labeled as one of their Linux VM's
With that, here it is:
Number 9 : Samurai Web Testing Framework (WTF).
The Samurai Web Testing Framework is a live Linux environment that has been pre-configured to function as a web pen-testing environment. The CD contains the best of the open source and free tools that focus on testing and attacking websites. Developed by Kevin Johnson [security analyst] and Justin Searle [IT Security Architect for JetBlue Airways] specially for hacking web based application and websites. Bad thing it is only available as Live DVD, and its one of more difficult distro's to install. Interested ? then check out their page Here.
Number 8 : Back Box Linux.
BackBox is a Linux distribution based on Ubuntu. It has been developed to perform penetration tests and security assessments. Designed to be fast, easy to use and provide a minimal yet complete desktop environment, its own software repositories, are always being updated to the latest stable version of the most used and best known ethical hacking tools. Check it out Here.
Number 7 : Gnacktrack :
Ahh, gnackTrack is no-doubt the best looking Pentesting operating system ever,and this is the best for beginner hackers,it has a good software library,GnackTrack is a Live (and installable) Linux distribution based on Ubuntu.The latest version "GnackTrackR6" is gaining a lot of popularity and you should try it out if you are interested.Official Site Here.
Number 6 : Network Security Toolkit (NST).
The Network Security Toolkit (NST) is Based of Fedora (not debian ) and The main intent of developing this toolkit was to provide the network security administrator with a comprehensive set of Open Source Network Security Tools.This Distro has a whole new level of Graphical Interface and damm it looks good.Get this beautiful yet dangerous OS Here.
Number 5 : Live Hacking Operating System.
Live Hacking DVD is a Linux distribution packed with tools and utilities for ethical hacking, penetration testing and countermeasure verification. Based on Ubuntu this distribution comes in two forms. A full Linux desktop including a graphical user interface (GNOME) and tools and utilities..Another in live DVD form.Plus Point : This distro has a huge guide on hacking on its official site.Get this Distro Here
Number 4 :DEFT Digital Evidence & Forensic Toolkit.
DEFT 7 is based on the new Kernel 3 (Linux side) and the DART (Digital Advanced Response Toolkit) with the best freeware Windows Computer Forensic tools. It’s a new concept of Computer Forensic system that use LXDE as desktop environment.It is a very professional and stable system that includes an excellent hardware detection and the best free and open source applications dedicated to Incident Response, Cyber Intelligence and Computer Forensics.Get this Swiss Army Knife of the PC world Here
Number 3 : BlackBuntu Linux.
Blackbuntu is distribution for penetration testing which was specially designed for security training students and practitioners of information security. It's currently being built using the xubuntu 12.04.This edition has a large software library and nearly 100000's tutorials flying on YouTube and other sites. Blackbuntu runs on almost any PC,new or old,because of its less requirements.The Main developer,Krit Kadnok says "It's created in our own time as a hobby."Get Blackbuntu Here.
Number 2 : BugTraq Operating System.
Bugtraq system offers the most comprehensive distribution, optimal, and stable with automated services manager in real time. Bugtraq is available with XFCE, Gnome and KDE based on Ubuntu, Debian and OpenSuse. The systems are available in 11 different languages. Bugtraq has the widest range of tools and a whole lot of tutorials on the net,besides that,This distro has a sick interface.Get this Here.Number 1 : BackTrack Operating System.
BackTrack is an Operating system which is especially made for Hackers,ethical Hackers,Penetration testers etc.This operating system includes all the security assessments and features till date.This distro got it all,Slick Interface,Powerful yet latest tools,high compatibly large software library,tons of tutorial.you name it.This is used by FBI,NSA and most of the hackers.So why don't you try it ? Get Version 5r3 from Here.
Man-in-the-middle attacks using Ettercap
Introduction To Man-In-The-Middle Attacks -
Man in the middle attacks is known as eavesdropping in the computer world. In these attacks, the attackers makes a fake bridge connections with the victims and relays message so they think that the connection is working the way it is supposed to work. With this connection, the attacker can see all the same traffic that the victim sees. Basic man-in-the-middle attacks are easily stopped by employing a VPN; so you can see the importance of using a VPN when using public internet.
Introduction To ETTERCAP -
Ettercap,short for Ethernet Capture,Is an open source app that creates an fake connection to your victim and the router,captures and send's data to its destination.It features sniffing of live connections, content filtering on the fly and many other interesting tricks. It supports active and passive dissection of many protocols and includes many features for network and host analysis.
Installing ETTERCAP -
For Debian (Linux) based editions -
Debian based editions (Ubuntu,backtrack,etc) can install Ettercap by using these steps -
1-Open Your Terminal.
2-Type: sudo apt-get install ettercap-gtk ettercap-common
3 -When you have installed it, type on the terminal: sudo gedit /etc/etter.conf
4 - Look for something like "iptables" and delete the #.
5 -It Should look like:
redir_command_on = "iptables -t nat -A PREROUTING -i %iface -p tcp --dport %port -j REDIRECT --to-port %rport".
-what this does is route connections from your incoming to the outgoing internet connection on your machine; this will make the victim unaware that someone is spying on their traffic.
For Windows based editions -
1-Get the installer from Here
2 -Install it by using the on-screen steps.
Setting Up ETTERCAP -
1 - Run the application.
2 - Click "Sniff -Unified Sniffing",then choose the network from the drop-down list you want to attack.
3 - Once you have chosen the interface the something like this will open:
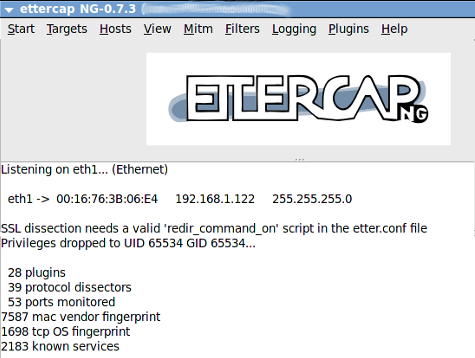
4 - Now go to - “Hosts->Scan for Host",now it will scan the network for other computers.
5 - When completed,click on "Hosts-> Host List",it will show up the available computers.
6 - Now select the computer you want to attack (example 192.168.0.5) as TARGET 1,And the ip of router (example 192.168.0.1) as TARGET 2.
7 - Now go to "MITM -> Arp Poisoning,and select the “Sniff Remote Connection” and click “ok”.
8 - Click "Start" and choose "Start Sniffing".
How Could the Attacker use this data -
The captured data can be easily used for sniffing password for Google Facebook,yahoo etc and they can also use it as a monitoring device,and see what kind of porn you like :P
NOTE : ETTERCAP can cause instability of network and the windows version is not too much stable, Restart the router in order to regain stability.
Thursday, January 17, 2013
resetting passwords in Windows8/7
Here I will try to make an easy to follow tutorial that will be usefull for novice users as well as professionals when they get stuck behind the logon screen of a Windows 8 because they lost or forgotten their password. So here's how to do it in 10 minutes or less :

24- confirm the new password when prompted and hit Enter key when done:

25- Type exit and hit the Enter key to close the command window.
26- Logon now to the locked account with the new password you just created.

27- After successfully unlocking your account and resetting the account password now you need to roll back the changes youmade to Utilman.exe and cmd.exe, so go ahead and boot your pc with the System Recovery CD or USB you made earlier in thistutorial and repeat steps in # 6 so you open the command prompt window
28- Type: c: and hit Enter key(your Windows drive maybe different so change it accordingly to the drive letter you have)
29- Type: cd windows (watch for spaces) and hit Enter key [see picture below]
30- Type: cd system32 (watch for spaces) and hit Enter key [see picture below]
31- Type: del Utilman.exe (watch for spaces) and hit Enter key [see picture below]
32- Type: ren Utilman.exe.original Utilman.exe (watch for spaces) and hit Enter key [see picture below]
33- Type: ren cmd.exe.original cmd.exe (watch for spaces) and hit Enter key [see picture below]
34- Type: shutdown -r -t 00 (watch for spaces) and hit Enter key to reboot your pc [see picture below]

35- Now when the pc reboots and reaches the logon screen, check to see if the Utilman is fixed and returned back to place by clicking on its icon on the bottom left side of the screen, if the Ease of Access list pops up then you succeeded in your work.
PS: some of you might have a Windows 8 Installation DVD, he can use it also in this process, boot with this Windows DVD and when you reach the first screen where you have to click next - stop there and hit SHIFT key + F 10 , the command prompt window will pop up and you can use it as we did in steps 7 onward to the end.
1- You need a Windows 8 PC to make a System Recovery Disk .
2- You need a CD Burner + Blanck CD.
3- If you have a tablet or a netbook and you don't have a CD burner then You need a 512 MB USB thumb drive to make a System Recovery USB instead.
4- To make a system recovery CD, Go to control panel and navigate to Windows 7 File Recovery, click on that icon, and from the next screen choose from the top left ( Create a System Recovery Disk ) and follow the on-screen instructions to make that CD.
5- To make a System Recovery USB thumb drive go to control panel and navigate to ( Recovery ), click on that icon and from the next screen choose ( Create a recovery drive ) and follow the instructions to make a bootable System Recovery USB.
6- When you are ready, boot the locked PC that needs to be unlocked with that CD or USB you just made, and follow the pictures below :


7- The command prompt screen will open, type : diskpart and hit Enter key

2- You need a CD Burner + Blanck CD.
3- If you have a tablet or a netbook and you don't have a CD burner then You need a 512 MB USB thumb drive to make a System Recovery USB instead.
4- To make a system recovery CD, Go to control panel and navigate to Windows 7 File Recovery, click on that icon, and from the next screen choose from the top left ( Create a System Recovery Disk ) and follow the on-screen instructions to make that CD.
5- To make a System Recovery USB thumb drive go to control panel and navigate to ( Recovery ), click on that icon and from the next screen choose ( Create a recovery drive ) and follow the instructions to make a bootable System Recovery USB.
6- When you are ready, boot the locked PC that needs to be unlocked with that CD or USB you just made, and follow the pictures below :
7- The command prompt screen will open, type : diskpart and hit Enter key
8- Type : list vol and hit Enter key (watch for spaces)

9- locate your Windows partition letter ( in our case here the letter will be C drive)
10- Type : Exit and hit Enter key.

11- Type: c: and hit Enter key (your Windows drive maybe different so change it accordingly to the drive letter you have)

12- Type: cd windows (watch for spaces ) and hit Enter key

13- Type: cd system32 (watch for spaces) and hit Enter key

14- Type: copy cmd.exe cmd.exe.original (watch for spaces) and hit Enter key.

15- Type: copy Utilman.exe Utilman.exe.original (watch for spaces) and hit Enter key.

16- Type: del Utilman.exe (watch for spaces) and hit Enter key.

17- Type: ren cmd.exe Utilman.exe (watch for spaces) and hit Enter key.

18- Type: Shutdown -r -t 00 (watch for spaces) and hit Enter key, the PC will restart.

19 – When you reach the Logon screen click on the Ease of Access Center icon on the left bottom side of the screen.
20 – The command prompt window will open
21- Type: net user (watch for spaces) and hit Enter key.

22- Type: net user <username> * ( replace <username> with the name you find in your pc) and hit Enter key
23- now type the new password you want and hit Enter key( when you type the cursor will not move and you will not see what you type, so be carefull what you type, because you are typing blindly the new password)
9- locate your Windows partition letter ( in our case here the letter will be C drive)
10- Type : Exit and hit Enter key.
11- Type: c: and hit Enter key (your Windows drive maybe different so change it accordingly to the drive letter you have)
12- Type: cd windows (watch for spaces ) and hit Enter key
13- Type: cd system32 (watch for spaces) and hit Enter key
14- Type: copy cmd.exe cmd.exe.original (watch for spaces) and hit Enter key.
15- Type: copy Utilman.exe Utilman.exe.original (watch for spaces) and hit Enter key.
16- Type: del Utilman.exe (watch for spaces) and hit Enter key.
17- Type: ren cmd.exe Utilman.exe (watch for spaces) and hit Enter key.
18- Type: Shutdown -r -t 00 (watch for spaces) and hit Enter key, the PC will restart.
19 – When you reach the Logon screen click on the Ease of Access Center icon on the left bottom side of the screen.
20 – The command prompt window will open
21- Type: net user (watch for spaces) and hit Enter key.
22- Type: net user <username> * ( replace <username> with the name you find in your pc) and hit Enter key
23- now type the new password you want and hit Enter key( when you type the cursor will not move and you will not see what you type, so be carefull what you type, because you are typing blindly the new password)
24- confirm the new password when prompted and hit Enter key when done:
25- Type exit and hit the Enter key to close the command window.
26- Logon now to the locked account with the new password you just created.
27- After successfully unlocking your account and resetting the account password now you need to roll back the changes youmade to Utilman.exe and cmd.exe, so go ahead and boot your pc with the System Recovery CD or USB you made earlier in thistutorial and repeat steps in # 6 so you open the command prompt window
28- Type: c: and hit Enter key(your Windows drive maybe different so change it accordingly to the drive letter you have)
29- Type: cd windows (watch for spaces) and hit Enter key [see picture below]
30- Type: cd system32 (watch for spaces) and hit Enter key [see picture below]
31- Type: del Utilman.exe (watch for spaces) and hit Enter key [see picture below]
32- Type: ren Utilman.exe.original Utilman.exe (watch for spaces) and hit Enter key [see picture below]
33- Type: ren cmd.exe.original cmd.exe (watch for spaces) and hit Enter key [see picture below]
34- Type: shutdown -r -t 00 (watch for spaces) and hit Enter key to reboot your pc [see picture below]
35- Now when the pc reboots and reaches the logon screen, check to see if the Utilman is fixed and returned back to place by clicking on its icon on the bottom left side of the screen, if the Ease of Access list pops up then you succeeded in your work.
PS: some of you might have a Windows 8 Installation DVD, he can use it also in this process, boot with this Windows DVD and when you reach the first screen where you have to click next - stop there and hit SHIFT key + F 10 , the command prompt window will pop up and you can use it as we did in steps 7 onward to the end.
setting up a VPN
If you want secure access to your network when away from the office, you can setup a Virtual Private Network (VPN ). You can connect via the Internet and securely access your shared files and resources. You don't have to buy an expensive VPN server if don't have a lot of users. Windows actually provides VPN server and client functionality.
In this tutorial, we'll set up the Windows 7 or Vista VPN server and connect with Windows XP, Vista, or 7. Now let's get started!
Avoiding IP conflicts
Since VPN connections link networks together, you must be careful with the subnet and IP addressing so there aren't any conflicts. On the network hosting the VPN server, you should use an uncommon default IP for the router, such as 192.168.50.1. If you have multiple offices, assign each to a different uncommon IP/subnet, such as 192.168.51.1, 192.168.52.1, and so on.

Create an incoming VPN connection in Windows
To configure the Windows VPN server, you do what is described by Microsoft as "creating an incoming connection." This will be the server or host of the VPN. Among other things, you'll specify the users you want to be able to connect. Follow these steps to create an incoming connection:
- Right-click the network icon in the system tray and select Open Network and Sharing Center.
- Click on Manage network connections (Windows Vista) or Change adapter settings (Windows 7).
- Press the Alt key to show the File Menu and click File > New Incoming connection… .
- Select who you'd like to give VPN access to and/or create custom accounts by clicking on Add someone. When you're done, click on Next.
- Select Through the Internet, and click Next.
- Select the protocols you want to enable for this connection. You'll likely want to select Internet Protocol Version 4 (TCP/IPv4), so remote users receive an IP address and can access the Internet and/or network. Plus if you want the remote user(s) to access file and/or printer shares, select File and Printer Sharing for Microsoft Networks. When you're done, click Allow access.
- On the next window, click Close.
Now you need to access the properties of the newly created incoming network connection and define the IP address range for VPN clients:
- On the Network Connections window, double-click Incoming Connections.
- Select the Networking tab and double-click Internet Protocol Version 4 (TCP/IPv4).
- Select Specify IP addresses and then enter a starting and ending address that's within range of your local subnet but not conflicting with the DHCP range. For example, if your router's IP is 192.168.50.1, you might enter 192.168.50.50 to 192.168.50.59 which would support 10 clients. If you want clients to be able to assign themselves an IP, select that option.
- Click OK on both dialog boxes to save the changes.
Configure any third-party firewalls
Windows will automatically allow the VPN connections through Windows Firewall when you configure the incoming connection on the host PC. However, if you have a third-party firewall installed on the host PC, you need to make sure the VPN traffic is allowed. You may have to manually enter the port numbers 47 and 1723.
Configure your IP address, dynamic DNS, and router
To enable VPN connections to the host PC from the Internet, you must configure your router to forward them to the Windows PC that's accepting the incoming connections. You specify the host PC by entering its local IP address. Therefore, before you setup the port forward, you should ensure the IP address won't change.
Start by logging into to the Web-based control panel of the router. Then go to the Network or DHCP settings and see if you can reserve the IP address for the PC so it always gets the same one. This may be called DHCP reservation or Static DHCP. Some routers don't have this feature. In this case, you'll need to manually assign the PC a static IP in the TCP/IP settings of the network connection in Windows.
Once you have figured out the IP address, find the virtual server or port forwarding settings in the router's web-based control panel. Then create an entry forwarding port 1723 to the local IP address of the PC, such as Figure 6 shows. Don't forget to save the changes!

If your Internet connection uses a dynamic IP address, rather than a static one, you should signup and configure a dynamic DNS service. This is because when you configure the remote clients, you have to input the Internet IP address of where the host PC is located. This will be a problem if the IP changes. However, you can sign up for a free service, such as from No-IP, and input your account details into the router so it will update the hostname with your IP. Then you'll have a hostname (such as yourname.no-ip.org) to input into remote clients, which will always point to the current Internet IP address of your host PC.
Now everything on the server side should be configured and ready to go. Next you need to setup the clients.
Create outgoing VPN connections in Windows
Now that you have the server setup, you need to configure the computers which you want to connect from, called the VPN clients. Here's how to in Windows Vista and 7:
- Right-click the network icon in the system tray and select Open Network and Sharing Center.
- Click Set up a connection or network (Windows Vista) or Set up a new connection or network
- On the wizard, select Connect to a workplace, and click Next.
- Select Use my internet connection (VPN).
- Type the Internet IP address or hostname into the Internet address and enter something for the Destination name. You'll probably want to keep the other options disabled. Click Next to continue.
- Enter a User name and password that was selected when you created the incoming VPN connection, and click Next to try to connect. It will attempt to connect using the following protocols: SSTP, PPTP, and then L2TP.
- Once connected, click Close.
Windows may by default assign the connection as a Public Network, limiting sharing functionality. Therefore you probably want to change this. If you aren't prompted to do so, open the Network and Sharing Center and click Customize (Windows Vista) or the Public network link under the connection name (Windows 7). Then on the popup window, select Work Network.
Here's how to create and outgoing VPN connection in Windows XP:
- Open the Network Connections window and click Create a new connection.
- Select Connect to the network at my workplace, and click Next.
- Select Virtual Private Network connection, and click Next.
- Enter a name for the connection, and click Next.
- Select Do not dial the initial connection, and click Next.
- Type the Internet IP address or hostname, and click Next.
- Click Finish.
Limiting VPN traffic
By default, all the Internet traffic on the VPN client will pass through the VPN rather than the local Internet they are connected to. This is great if they are using a public connection, like a port in a hotel or Wi-Fi hotspot, since it keeps their browsing private. However, if they are on a trusted network, like at their home or remote office, this just might be wasting bandwidth. To limit the traffic that passes through the VPN connection:
- On the Network Connections window, right-click the VPN connection and select Properties.
- Select the Network tab and double-click Internet Protocol (TCP/IP).
- Click the Advanced button and uncheck Use default gateway on remote network.
- Click OK on the dialog boxes to save changes.
Now the VPN client will use the local Internet connection when browsing websites. It will only use the VPN connection when a server or IP address isn't reachable via the Internet, such as when accessing shares on the VPN host network.
Connecting to the VPN
In Windows XP, you can connect and disconnect by opening the Network Connections window and right-clicking the VPN connection. In Windows Vista, you can click the network icon in the system tray, click Connect to, and then select the connection. In Windows 7, click the network icon in the system tray and select the VPN connection.
After you connect, you should be able to access the shared resources on the VPN host network. Keep in mind; you may have to manually access shares (e.g. ip_address_of_computer or file://computer_name/) rather than browsing in My Network Places or Network.
Thursday, September 13, 2012
Kismet
The goal for this post was really just a quick way to get Kismet up and running and then viewing the output quickly.
I will just detail the steps to get this working and what to do with the data once you have collected it. I am using BackTrack 5 r3 within a Virtual Machine and an Alfa AWUS036H set at 30db. You can skip step 2 if you are not using a virtual machine.

Select your interface preference . I chose [ Yes]


I will just detail the steps to get this working and what to do with the data once you have collected it. I am using BackTrack 5 r3 within a Virtual Machine and an Alfa AWUS036H set at 30db. You can skip step 2 if you are not using a virtual machine.
1. UPDATE BACKTRACK!!!
- root@bt:~# apt-get update && apt-get dist-upgrade
- Let this complete, it may take upwards on 2-5 minutes depending on if its a fresh install.
2. Plug in your Alfa, connect it to the VM and restart networking
- Connect the Alfa USB to the VM by performing the steps below. Additionally you can use the icon row at the bottom of VMware workstation to connect the device. With Fusion, simply click Virtual Machine // USB // Connect Realtek [Model]
- Once the adapter is attached to the VM, restart networking… just to have a clean attachment.
- root@bt:~# /etc/init.d/networking stop
- root@bt:~# /etc/init.d/networking start
- Check that the adapter has been detected and is functioning by checking iwconfig
- root@bt:~# iwconfig
- Determine what interface is associated with your Alfa (Realtek RTL8187) chipset.
- root@bt:~# airmon-ng
- In my example we are going to use: wlan0 (zero)
- root@bt:~# iwconfig
3. Update Kismet
- Grab the latest version from http://www.kismetwireless.net/download.shtml and install it. Be sure to review ALL documentation here.
- root@bt:~# wget https://www.kismetwireless.net/code/kismet-2011-03-R2.tar.gz (or whatever the latest version is)
- root@bt:~# tar xvfz kismet-2011-03-R2.tar.gz
- root@bt:~# cd kismet-2011-03-R2
- root@bt:~/kismet-2011-03-R2# ./configure
- root@bt:~/kismet-2011-03-R2# make install (this may take upwards of 5 – 10 minutes)
4. Start Kismet
- Be sure to read the kismet help file for all available switches. I am purposely NOT using -c to specify an interface.
- root@bt:~# kismet
- Note: If you are not going to use GPS, edit your kismet.conf file and tell it you are not going to.
- root@bt:~# vi /usr/local/etc/kismet.conf
- Edit the line: Do we have a GPS? to say “gps=false”
- Helpful navigation tips. [TAB] moves selection. [`] Brings up menu items, arrow and enter keys allow interaction between items.

Select your interface preference . I chose [ Yes]
- After choosing interface options, you will be ‘reminded’ that kismet is running as root. Be sure to determine the risk before answering.

- Choose if you would like to start the kismet server. Kismet runs in a client/server configuration. More details here. Note, once you start the server, a number of files will be generated and placed on your desktop. (Assuming you started kismet within that directory) Do not delete these files, they are the logs of the captures.

- Select [ YES ] to add an interface for raw capture.

- Enter the interface you are going to use (from step 2) and enter any options or name and select [ Add ]

- An error about dhclient looking at the adapter you have chosen will appear if you have not stopped the service. To stop it specifically for your wireless adapter, just look at the open files and kill the dhclient service attached to wlan0.
- root@bt:~# lsof | grep wlan0
- root@bt:~# kill -9 [PSID]

- To view the traffic Kismet is seeing, you will need to close the console. (Don’t worry, you can get it back if you need)

- The Kismet menu system can be engaged by pressing the [`]or [~] and then use the arrow keys to navigate.

- To interact with the visible networks, head over to the sort menu and select your sorting preference. I chose [ type ] for this example. You can select the network you want more details about by navigating to it and pressing enter.


5. Reviewing Captures
Now Kismet has been capturing data, how can we look at it?- You should have 5 files (depending on your switches and options you may end up with more or less.
-
- Kismet-[ date/time].netxml
- Kismet-[date/time].gpsxml
- Kismet-[date/time].alert
- Kismet-[date/time].nettxt
- Kismet-[date/time].pcapdump
- To view the .netxml file in excel, simply rename and drop the [net].

- Then simply import the .xml file into excel.
- In excel 2010, I was only able to open the data in read only mode.

- To view uptime in days, for the AP’s. Josh Wright has provided a nice formula we can use.
- Apply: =U[cell]/(1000000 * (60 * 60 * 24)) to the “/bsstimestamp column.
- Example: =U70/(1000000*(60*60*24))
- Row 76 becomes 77, where row 77 contains the time in Days in the last column.
Wrap up
There are many ways to view and capture data with Kismet, using xplico plus the .pcap could prove useful. I have only scratched the surface of what is possible. The purpose of this post wasn’t to include every possible combination, but to get you up and running quickly using kismet and reviewing the data just as fast.Wednesday, August 22, 2012
Vulnerability Scanning/Metasploit
Vulnerability scanning
So, what's the purpose of vulnerability scanning, and how does Metasploit fit in? A vulnerability scanner is similar to other types of scanners—for example, port scanners help secure the network and the systems on it. The goal of such scans is to detect any weaknesses and use the results to address the problems before the "bad guys" do.
Common problems detected during the scanning process include locating buffer overflows, unpatched software, Structured Query Language (SQL) problems, and so on. How much a scanner detects depends on the software itself: Some scanners are much more aggressive in their scans, detecting missing patches or configuration errors, while others just seem to point you in the right direction.
Metasploit goes a step beyond regular vulnerability scanners: It provides you the ability to develop your own exploits and delivery mechanisms. The idea is that where other scanning methods rely on known problems, Metasploit allows you to develop your own with the intention of allowing more flexibility in scanning as well as research.
What's a vulnerability scanner?
Simply put, a vulnerability scanner is a piece of software specifically designed to search for and reveal weaknesses in an application or operating system. Each vulnerability scanner may perform its own scans and probes differently, but the result is more or less the same: a report or some sort of output informing you of the problems discovered.
The process of vulnerability scanning can be broken down into a series of steps, each of which is a vital task needed to locate the weaknesses in an application or operating system:
- Provide the scanning software with the IP or host names of active systems. In this way, the scanner will be able to find open ports, services that respond, and any applications that may be currently running on the system.
- The scanner generates a report informing you of what it discovered. This information may not be fully actionable and may require more research if the scanner ends at this step. With other scanners, this step may simply reveal the ports, services, and applications running so that the software can proceed to the next step.
- The software runs probes against the ports and services discovered in Step 2, with the goal of returning information on the patch level, software revisions, or any one of a number of potential flaws. Modern vulnerability scanners have plug-ins designed to look for new weaknesses as they emerge. So, what a scanner does not find today it may very well find tomorrow after you perform an update.
- Depending on how advanced the scanner is, the software may attempt to exploit vulnerabilities (if this feature is supported). In fact, some more modern scanners can have their aggressiveness at this step configured, meaning that they will not be so aggressive in their scanning that they bring down a system (which they can and have been known to do).
What is Metasploit?
The Metasploit Project is a series of projects that have spawned tools used for everything from defeating forensic methods and evading detection to its best-known software, the Metasploit Framework. Metasploit is not intended to be a hacking tool, even though it may sound like one on the surface. Indeed, the tool's primary goal is security research. However, as with any tool of this type, how it's used depends on the user. Remember, "With great power comes great responsibility," so be careful. Currently, Metasploit runs on most of the Nix-based systems as well as on some of the other common operating systems in use.
How Metasploit works
Metasploit breaks down the steps mentioned earlier in the description of vulnerability scanners, with the goal of uncovering vulnerabilities. Basically, the scanner:
- Selects and configures the exploit to be targeted. This is the code that will be targeted toward a system with the intention of taking advantage of a defect in the software.
- Validates the exploit against the system with the intention of discovering whether the system is vulnerable to the exploit.
- Selects and configures a payload that will be used. This payload represents the code that will be run on a system after the scanner discovers an entry point into the system.
- Selects and configures the encoding and delivery technique that will be used.
- The goal of this step is to format the payload in such a way that it can evade entrenched intrusion-detection systems (IDSs).
- Executes the exploit.
This section provides an overview of what the Metasploit Framework does for users trying to discover vulnerabilities. I don't get into the specifics of how to run each exploit or write shell code. Instead, I give a broad overview of the process so you can get an idea of what's involved and determine whether the software is right for your testing needs.
For those of you who have never seen or worked with Metasploit, you will probably discover that the Metasploit Framework is surprisingly easy to use. In fact, you may find the product so easy to use that you may pay a little more attention to your patch-management process and stay informed of the latest fixes and vulnerabilities lest someone else point this tool your way.
When you think about it, this tool is the equivalent of an offensive weapon in the real world. The tool can be freely downloaded and installed with a myriad of prepackaged exploits that are already verified to work against specific platforms and applications. These exploits even come with their own matching payloads to make the process that much easier. Each preconfigured exploit is already set up to determine what to do upon delivery when the exploit is executed.
Note: Even though Metasploit ships with several preconfigured exploits, it's important to realize that the software was envisioned as an exploit-development environment. You can use the tools that the software provides to test whether systems are vulnerable and how they will react when you direct specific payloads toward them.
Running an exploit
First, let's look at the process of running Metasploit. This process should apply to running most exploits and payload deliveries. In this scenario, I look generically at how you could launch an attack from one system against another.
Note: The following steps have been sanitized to prevent anyone from using them to cause mischief.
You can perform the steps here with just about any form of Linux. You may have to look up specifics for your environment, but this process should give you an understanding of what's going on.
To use Metasploit to run an exploit, perform the following steps:
1. Download WHAX 3.0 for Linux (included with BackTrack5)
2. From the command line, type the following command to launch the Metasploit console:
# " ./msfconsole "
3. Choose an exploit to use against your target system. Three commands are available for this purpose:
- use: Specify an exploit.
- show: Display information in context.
- info: Provide details about a specific module.
<!--[if !supportLists]-->show
<!--[if !supportLists]--><!--[endif]-->info
The format of the command you use to run an exploit is:
“use <exploit name>”
4. Type the following command to start the exploit:
use iis50_webdav_ntdll"
Configuring the exploit
After you've selected your exploit, you need to configure how it will run. Specifically, you must specify the destination IP address and port against which to run the exploit. The set command allows you to specify configuration options; if you include the show advanced command, you'll be shown any options you can configure.
Use the following command to set options:
set RHOST <your test machine's IP address>
Then, press the Enter key. Next, type this code on the following line:
set RPORT 80
To perform a check to see whether the exploit functioned, type:
check
The results you get depend on the target.
If your check fails, you may need to configure other options for the target system—for example, details of the operating system.
Next, type:
show targets
Depending on the exploit, you may see additional information regarding the exploit, such as which services support it.
The perfect attack
You insert the Metasploit payload—also known as shell code— directly into the buffer that you're overflowing. In most cases, the payload is very specific, and which one you choose depends on the operating system and architecture of your target. This is a high-level introduction to using Metasploit to provide a generic overview of your system's vulnerabilities. With a bit of work and research, you can develop your own exploits. After developing exploits, you can determine whether your applications and systems are vulnerable to exploits such as buffer overflows and holes such as SQL injections.
Tuesday, August 21, 2012
Scanning - Knowing your Network
Scanning
The scanning process can be divided into three steps:
1.Determining if a system is active.
2.Port scanning the system.
3.Scanning the system for vulnerabilities.
Step 1 is the process of determining whether a target system
is turned on and capable of communicating or interacting with our machine. This
step is the least reliable and we should always continue with steps 2 and 3
regardless of the outcome of this test. Regardless, it is still important to
conduct this step and make note of any machines that respond as alive.
Ports provide a way or location for software and networks to
communicate with hardware like a computer. A port is a data connection that
allows a computer to exchange information with other computers, software, or
devices.
Port Number
Service
20 FTP data
transfer
21 FTP control
22 SSH
23 Telnet
25 SMTP
(e-mail)
53 DNS
80 HTTP
443 HTTPS
Pings and Ping Sweeps
A ping is a special type of network packet called an ICMP
packet. Pings work by sending specific types
of network traffic, called ICMP Echo Request packets, to a specific interface
on a computer or network device. If the device (and the attached network card)
that received the ping packet is turned on and not restricted from responding,
the receiving machine will respond back to the originating machine with an Echo
Reply packet. Aside from telling us that a host is alive and accepting traffic,
pings provide other valuable information including the total time it took for
the packet to travel to the target and return.
connection.
The simplest way to run a ping sweep is with a tool called
FPing. FPing is built into Backtrack and is run from the terminal. The easiest
way to run FPing is to open terminal window and type the following:
fping –a –g 172.16.45.1 172.16.45.254>hosts.txt
The “–a” argument is used to show only the live hosts in the
output. This makes our final report much cleaner and easier to read. The “–g”
is used to specify the range of IP addresses we want to sweep. You need to
enter both the beginning and the ending IP addresses. In this example, we
scanned all the IPs from 172.16.45.1 to 172.16.45.254. The “>” character is
used to pipe the output to a file, and the hosts.txt is used to specify the
name of the file our results will be saved to.
Port Scanning
There are a total of 65,536 (0–65,535) ports on every
computer. Ports can be
either TCP or UDP depending on the service using the port.
We scan computers to see what ports are in use or “open”. This gives us a
better picture of the purpose of the machine, which gives us a better idea
about how to attack the box.
TCP 3-Way Handshake
Before we go on, we first have to know how computers on a
network communicate with each other. When two computers want to communicate,
they go through a processes known as the 3-way handshake. The first computer A
will send a synchronize packet to the other computer B. Then, if computer B is
listening (has its port open), it will respond back to A with a
synchronize-acknowledgement packet. Finally, computer A will send an
acknowledgement packet to computer B, and the two computers will communicate as
usual.
Using Nmap
Nmap was written by Gordon Lyon and is available for free
from www.insecure.org and is built into today’s Backtrack Linux 5.
It is the official guide to using the nmap scanner. What
more can I say? This book will cover nmap much more in depth than this site.
When we conduct a port scan, Nmap will create a packet and
send it to each designated port on the computer just like the 3-way handshake.
The goal is to determine what kind of a response we get from the target ports.
To use Nmap, open up the terminal and type:
nmap -p- 192.168.56.101
The “-p-” tells nmap to scan all ports on a target machine.
The 10.0.2.15 is the local ip of the target machine.
Vulnerability Scanning
To scan systems for vulnerabilities, we will use a
vulnerability scanner. There are several good scanners available, but we will
be focusing on Nessus. To install Nessus type:
root@bt:~# apt-get install nessus
Then, to access Nessus via the GUI go to:
Applications -> Backtrack -> Vulnerability Assessment
-> Vulnerability Scanner -> Nessus -> Nessus Start.
Medusa
Medusa is a log-in brute forcer that attempts to gain access
to remote services by guessing at the user password. Medusa is capable of
attacking a large number of remote services including FTP, HTTP, MySQL, Telnet,
VNC, Web Form, and more. In order to use Medusa, you need several pieces of
information including the target IP address, a username or username list that
you are attempting to log in as, a password or dictionary file containing
multiple passwords to use when logging in, and the name of the service you are
attempting to authenticate with.
Medusa comes installed on Backtrack 5. However, if you are
using a different version of backtrack without Medusa type:
apt-get update
apt-get install medusa
When using online password crackers, the potential for
success can be greatly
increased if you combine this attack with information
gathered from reconnaissance and scanning. An example of this is when you find
usernames, passwords, and email addresses. Programs like Medusa will take a
username and password list and keep guessing until it uses all the passwords.
Be aware that some remote access systems employ a password throttling technique
that can limit the number of unsuccessful log-ins you are allowed. Your IP
address can be blocked or the username can be locked out if you enter too many
incorrect guesses.
Backtrack includes a few word lists that you can use for
your brute forcing adventures. You can find one list at:
/pentest/passwords/wordlists/
In order to execute the brute-force attack, you open a
terminal and type the following:
medusa –h target_ip –u username –P
path_to_password_dictionary –M service_to_attack
“-h” is used to specify the IP address of the target host.
The “-u” is used for a single username that Medusa will use to attempt log-ins.
“-P” is used to specify an entire list containing multiple passwords. The “-P”
needs to be followed by the actual location or path to the dictionary file. The
“-M” switch is used to specify which service we want to attack.
More on NMap
The first step in any pentest/attack is to locate targets.
There is no better tool for this than nmap. I will usually use nmap for three
different scans: ping, port, version. The ping sweep allows me to locate
systems that are alive, the port scan tells me open ports on a system and the
version scan tells me specifics about the services that are listening on those
ports. The beauty of nmap is that you have so much flexibility in the range of
IP addresses you want to look at. To perform a ping sweep on addresses in the
range 10.75.0.1 to 10.75.0.10 perform the following: nmap -n -sP 10.75.0.1-10.
The -n switch tells nmap not to resolve host names making the scan much faster.
The -sP tells nmap to perform a ping sweep. Once you have located systems that
are alive the next step is to see what services (and potential holes for
exploit) exist on these systems. To do this perform a port scan via the
command: nmap -n -sT 10.75.0.1. This will perform a full TCP connection port
scan on 10.75.0.1. The -sT switch tells nmap to perform a full TCP connection
(i.e. SYN, SYN-ACK, ACK, RESET) on ports deemed “interesting” per the nmap
build you are using. By default the ports included are 1-1025 plus ports above
1025 that are in the network-services configuration file. In some instances you
may want to be a little more stealthy and would use the -sS port scan. This
tells nmap to perform a SYN scan using SYN-SYNACK-RESET. This scan doesn’t
create a full TCP connection and as such usually doesn’t get “logged”. Please
note that you can perform a port scan against a range of targets using the
range IP address range options in nmap. For example if I want to perform a port
scan across the IP addresses from 10.75.0.1 to 10.75.0.10 I would call: nmap -n
-sT 10.75.0.1-10. In reality a port scan will only take you so far. It tells
you that a host is listening on a specific port but it doesn’t give you any
defaults beyond the “default” for that port. For example port 80 is by default
HTTP but what is the specific server that is providing that access (IIS,
Apache, etc). To get these details we perform a version scan via: nmap -n -sV
10.75.0.1. A final scan I will perform is a OS fingerprinting via: nmap -n -sV
-O 10.75.0.1. This will tell you the OS and version with very reliabile
accuracy. Now with the information provided by nmap we can do the research to
know how to exploit the target system. This is a topic for another post.
Friday, August 17, 2012
Wireshark quick tips: filters
as we move forward preparing to really get deep into the pen testing and network testing, its good to know some ways to relly use Wireshark filters. so im going to list soem common filters and ones that i use regularly.
Filters:
ip.addr == 10.0.0.1 [Sets a filter for any packet with 10.0.0.1, as either the source or dest]
ip.addr==10.0.0.1 && ip.addr==10.0.0.2 [sets a conversation filter between the two defined IP addresses]
http or dns [sets a filter to display all http and dns]
tcp.port==4000 [sets a filter for any TCP packet with 4000 as a source or dest port]
tcp.flags.reset==1 [displays all TCP resets]
http.request [displays all HTTP GET requests]
tcp contains traffic [displays all TCP packets that contain the word ‘traffic’. Excellent when searching on a specific string or user ID]
!(arp or icmp or dns) [masks out arp, icmp, dns, or whatever other protocols may be background noise. Allowing you to focus on the traffic of interest]
udp contains 33:27:58 [sets a filter for the HEX values of 0x33 0x27 0x58 at any offset]
tcp.analysis.retransmission [displays all retransmissions in the trace. Helps when tracking down slow application performance and packet loss]
Frame Type/Subtype Filter
Management Frames - wlan.fc.type==0
Association Request - wlan.fc.type_subtype==0
Association Response - wlan.fc.type_subtype==1
Ressociation Request - wlan.fc.type_subtype==2
Ressociation Response - wlan.fc.type_subtype==3
Probe Request - wlan.fc.type_subtype==4
Probe Response - wlan.fc.type_subtype==5
Beacon - wlan.fc.type_subtype==8
ATIM - wlan.fc.type_subtype==9
Disassociate - wlan.fc.type_subtype==10
Authentication - wlan.fc.type_subtype==11
Deauthentication - wlan.fc.type_subtype==12
Association Request - wlan.fc.type_subtype==0
Association Request - wlan.fc.type_subtype==0
Control Frames - wlan.fc.type==1
Power-Save Poll - wlan.fc.type_subtype==26
Request To Send - RTS wlan.fc.type_subtype==27
Clear To Send - CTS wlan.fc.type_subtype==28
Acknowledgement - ACK wlan.fc.type_subtype==29
Data Frames - wlan.fc.type==2
NULL Data - wlan.fc.type_subtype==36
Search probe requests -wlan_mgt
Thursday, August 9, 2012
Packet Reading - Basics
Before i make another video post, i wanted to fist break down how packets work. This will be the introduction on how to read the outputs of TCPDUMP, TSHARK and WireShark.
TCP Flags
A, ACK- (Acknowledge) The receiver will send an ACK that equals the senders sequence number plus the Len, or amount of data, at the TCP layer.
SYN, and FIN flags count as 1 byte. The ACK can also be thought of as the sequence number of the next octet the receiver expects to receive.
S, SYN- Synchronize is used during session setup to agree on initial sequence numbers. Sequence numbers are random.
F, FIN- Finish is used during a graceful session close to show that the sender has no more data to send.
R, RST- Reset is an instantaneous abort in both directions (abnormal session disconnection).
P, PSH- Push forces data delivery without waiting for buffers to fill. This is used for interactive traffic. The data will also be delivered to the application on the receiving end with out buffering.
U, URG- Urgent- Data is sent out of band.
Example of 3 Way Hand Shake
--------------------------------------------------------------
Time Dst IP Src IP Protocol Description
20.862 157.57.24.193 157.57.11.169 TCP ....S., len: 4, seq: 346564214, ack: 0, win: 8192,
20.866 157.57.11.169 157.57.24.193 TCP .A..S., len: 4, seq: 339000739, ack: 346564215, win: 8760,
20.866 157.57.24.193 157.57.11.169 TCP .A...., len: 0, seq: 346564215, ack: 339000740, win: 8760,
Example of Graceful Close (Modified 3 Way Hand Shake)
Time Dst IP Src IP Protocol Description
39.295 157.57.11.169 157.57.24.193 TCP .A...F, len: 0, seq:339000917, ack: 346564257, win: 8718,
39.295 157.57.24.193 157.57.11.169 TCP .A...., len: 0, seq:346564257, ack: 339000918, win: 8583,
39.298 157.57.24.193 157.57.11.169 TCP .A...F, len: 0, seq:346564257, ack: 339000918, win: 8583,
39.300 157.57.11.169 157.57.24.193 TCP .A...., len: 0, seq:339000918, ack: 346564258, win: 8718,
In the above two traces, transmission control protocol (TCP) is the highest layer protocol, so the relevant session information can be read from the summary line of the trace. If there is a higher layer protocol (NBT, SMB, Telnet, FTP, etc.), you will have to look in the packet for the TCP flags, acks and sequence numbers.
39.295 157.57.24.193 157.57.11.169 TCP .A...., len: 0, seq:346564257, ack: 339000918, win: 8583,
39.298 157.57.24.193 157.57.11.169 TCP .A...F, len: 0, seq:346564257, ack: 339000918, win: 8583,
39.300 157.57.11.169 157.57.24.193 TCP .A...., len: 0, seq:339000918, ack: 346564258, win: 8718,
In the above two traces, transmission control protocol (TCP) is the highest layer protocol, so the relevant session information can be read from the summary line of the trace. If there is a higher layer protocol (NBT, SMB, Telnet, FTP, etc.), you will have to look in the packet for the TCP flags, acks and sequence numbers.
Re-transmission Behavior
(from "TCP/IP Implementation Details")
TCP starts a re-transmission timer when each outbound segment is handed down to IP. If no acknowledgment has been received for the data in a given segment before the timer expires, then the segment is retransmitted, up to the TcpMaxDataRetransmissions times. The default value for this parameter is 5.
The re-transmission timer is initialized to 3 seconds when a TCP connection is established; however it is adjusted "on the fly" to match the characteristics of the connection using Smoothed Round Trip Time (SRTT) calculations as described in RFC793. The timer for a given segment is doubled after each re-transmission of that segment. Using this algorithm, TCP tunes itself to the "normal" delay of a connection. TCP connections over high-delay links will take much longer to time out than those over low- delay links.
The following trace clip shows the re-transmission algorithm for two hosts connected over Ethernet on the same subnet. An FTP file transfer was in progress, when the receiving host was disconnected from the network. Since the SRTT for this connection was very small, the first re-transmission was sent after about one-half second. The timer was then doubled for each of the re-transmissions that followed. After the fifth re-transmission, the timer is once again doubled, and if no acknowledgment is received before it expires, then the transfer is aborted.
delta source ip dest ip pro flags description
-------------------------------------------------------------
0.000 10.57.10.32 10.57.9.138 TCP .A...., len: 1460, seq: 8043781, ack:8153124, win: 8760
0.521 10.57.10.32 10.57.9.138 TCP .A...., len: 1460, seq: 8043781, ack:8153124, win: 8760
1.001 10.57.10.32 10.57.9.138 TCP .A...., len: 1460, seq: 8043781, ack:8153124, win: 8760
2.003 10.57.10.32 10.57.9.138 TCP .A...., len: 1460, seq: 8043781, ack:8153124, win: 8760
4.007 10.57.10.32 10.57.9.138 TCP .A...., len: 1460, seq: 8043781, ack:8153124, win: 8760
8.130 10.57.10.32 10.57.9.138 TCP .A...., len: 1460, seq: 8043781, ack:8153124, win: 8760
After computer "X's" retries are exhausted, you may not see a "Reset" right away. If computer "Y" finally responds, computer "X" may then reset the connection.
Sliding Windows
During the handshake, the send window size is set to the other host's receive window. The window size is a buffer and is the amount of data the sender can send and the receiver can receive without an ack. The "window" can slide forward after that packet is acknowledged.
With a receive window of 8760, the sender may send 8760 bytes before receiving an ack. The receiver could ack every packet, every other packet or the entire 8760 depending on the IP stack and timing. (See Delayed Ack Timer, and Retransmit timer) Windows NT will ack every other packet. If the packets are coming extremely fast, you may see Windows NT ack more than 2 packets. If the PUSH bit set, data will be delivered up to the application right away, but the ack may still be delayed.
The sequence number in frame 51 is 349349990. The ack in frame 57 is 349358750. This is the sequence number from frame 51 plus the amount of data received in frames 51 through 56 (6 frames x 1460 =8760) . Also, the ack 349358750 is the sequence number of the next packet that the host expects to receive.
Frame Time Src Other Addr Dst Other Addr Protocol Description
---------------------------------------------------------------------
50 3.923 157.57.11.169 157.57.24.193 TCP .A...., len:0, seq: 356870796, ack: 349349990, win: 8760,
51 3.924 157.57.24.193 157.57.11.169 FTP Data Transfer To Client, Port = 1636, size 1460
+ TCP: .A...., len: 1460, seq: 349349990, ack: 356870796, win: 8760, src:20 dst: 1636
52 3.940 157.57.24.193 157.57.11.169 FTP Data Transfer To Client, Port = 1636, size 1460
53 3.941 157.57.24.193 157.57.11.169 FTP Data Transfer To Client, Port = 1636, size 1460
54 3.943 157.57.24.193 157.57.11.169 FTP Data Transfer To Client, Port = 1636, size 1460
55 3.944 157.57.24.193 157.57.11.169 FTP Data Transfer To Client, Port = 1636, size 1460
56 3.946 157.57.24.193 157.57.11.169 FTP Data Transfer To Client, Port = 1636, size 1460
57 3.947 157.57.11.169 157.57.24.193 TCP .A...., len:0, seq: 356870796, ack: 349358750, win: 4096,
The window size is also used for flow control. If a host is advertising a smaller window size when its buffers are filling, or a window size of 0 if it can not receive data at all. In frame 50 above, the host is advertising a window size of 8760 and in frame 57 it has been dropped to 4096.
Ports, Connections, and Endpoints
Port numbers define the ultimate destination within a computer. Connections are identified by a pair of endpoints. An Endpoint is the (host, port). Ex. (199.199.40, 21)
Port Numbers
The port numbers are divided into three ranges: the Well-Known Ports,the Registered Ports, and the Dynamic and/or Private Ports. The Well-Known Ports are those from 0 through 1023.The Registered Ports are those from 1024 through 49151. The Dynamic and/or Private Ports are those from 49152 through 65535.
Well-Known Ports are assigned by Internet Assigned Numbers Authority (IANA) and should only be used by System Processes or by programs executed by priviledged users. An example of this type of port is 80/TCP and 80/UDP. These ports are priviledged and reserved for use by the HTTP protocol.
Registered Ports are listed by the IANA and on most systems can be used by ordinary user processes or programs executed by ordinary users. An example of this type of port is 1723/TCP and 1723/UDP. Although these ports can be used by other processes they are generally accepted as the connection control port for Point To Point Tunnelling Protocol (PPTP).
Dynamic or Private Ports can be used by any process or user. They are unrestricted.
IANA maintains a list of ports on their Web site at:
http://www.iana.org/assignments/port-numbers
Microsoft provides third-party contact information to help you find technical support. This contact information may change without notice. Microsoft does not guarantee the accuracy of this third-party contact information.
Trace Reading Suggestions
Follow a session using source and destination IP address and Port numbers. If you find a Reset, focus on the sequence numbers and acks that proceed it. Use a calculator to see what ack is corresponding to what data sent. Newer versions of NetMon will do the calculations for you. Is the sender doing retries? Note the number of retries and the time elapsed. The default number of retries is 5. Is the receiver asking for a missed frame by ACKing a previous sequence number? Did the sender back up and resend the previous packet? A Reset can be caused by time-outs at the TCP layer or by time outs of higher layer protocols. Resets originating at the TCP layer should be easy to read from the trace. It may be more difficult to determine the cause of Resets originating from higher layer protocols.
For example, a Server Message Block (SMB) read may time out in 45 seconds and cause a Reset of the session even though communications are slow but working at the TCP layer. The trace may only narrow down what component is at fault. From there you may need to use other troubleshooting methods to determine the cause.
(from "TCP/IP Implementation Details")
TCP starts a re-transmission timer when each outbound segment is handed down to IP. If no acknowledgment has been received for the data in a given segment before the timer expires, then the segment is retransmitted, up to the TcpMaxDataRetransmissions times. The default value for this parameter is 5.
The re-transmission timer is initialized to 3 seconds when a TCP connection is established; however it is adjusted "on the fly" to match the characteristics of the connection using Smoothed Round Trip Time (SRTT) calculations as described in RFC793. The timer for a given segment is doubled after each re-transmission of that segment. Using this algorithm, TCP tunes itself to the "normal" delay of a connection. TCP connections over high-delay links will take much longer to time out than those over low- delay links.
The following trace clip shows the re-transmission algorithm for two hosts connected over Ethernet on the same subnet. An FTP file transfer was in progress, when the receiving host was disconnected from the network. Since the SRTT for this connection was very small, the first re-transmission was sent after about one-half second. The timer was then doubled for each of the re-transmissions that followed. After the fifth re-transmission, the timer is once again doubled, and if no acknowledgment is received before it expires, then the transfer is aborted.
delta source ip dest ip pro flags description
-------------------------------------------------------------
0.000 10.57.10.32 10.57.9.138 TCP .A...., len: 1460, seq: 8043781, ack:8153124, win: 8760
0.521 10.57.10.32 10.57.9.138 TCP .A...., len: 1460, seq: 8043781, ack:8153124, win: 8760
1.001 10.57.10.32 10.57.9.138 TCP .A...., len: 1460, seq: 8043781, ack:8153124, win: 8760
2.003 10.57.10.32 10.57.9.138 TCP .A...., len: 1460, seq: 8043781, ack:8153124, win: 8760
4.007 10.57.10.32 10.57.9.138 TCP .A...., len: 1460, seq: 8043781, ack:8153124, win: 8760
8.130 10.57.10.32 10.57.9.138 TCP .A...., len: 1460, seq: 8043781, ack:8153124, win: 8760
After computer "X's" retries are exhausted, you may not see a "Reset" right away. If computer "Y" finally responds, computer "X" may then reset the connection.
Sliding Windows
During the handshake, the send window size is set to the other host's receive window. The window size is a buffer and is the amount of data the sender can send and the receiver can receive without an ack. The "window" can slide forward after that packet is acknowledged.
With a receive window of 8760, the sender may send 8760 bytes before receiving an ack. The receiver could ack every packet, every other packet or the entire 8760 depending on the IP stack and timing. (See Delayed Ack Timer, and Retransmit timer) Windows NT will ack every other packet. If the packets are coming extremely fast, you may see Windows NT ack more than 2 packets. If the PUSH bit set, data will be delivered up to the application right away, but the ack may still be delayed.
The sequence number in frame 51 is 349349990. The ack in frame 57 is 349358750. This is the sequence number from frame 51 plus the amount of data received in frames 51 through 56 (6 frames x 1460 =8760) . Also, the ack 349358750 is the sequence number of the next packet that the host expects to receive.
Frame Time Src Other Addr Dst Other Addr Protocol Description
---------------------------------------------------------------------
50 3.923 157.57.11.169 157.57.24.193 TCP .A...., len:0, seq: 356870796, ack: 349349990, win: 8760,
51 3.924 157.57.24.193 157.57.11.169 FTP Data Transfer To Client, Port = 1636, size 1460
+ TCP: .A...., len: 1460, seq: 349349990, ack: 356870796, win: 8760, src:20 dst: 1636
52 3.940 157.57.24.193 157.57.11.169 FTP Data Transfer To Client, Port = 1636, size 1460
53 3.941 157.57.24.193 157.57.11.169 FTP Data Transfer To Client, Port = 1636, size 1460
54 3.943 157.57.24.193 157.57.11.169 FTP Data Transfer To Client, Port = 1636, size 1460
55 3.944 157.57.24.193 157.57.11.169 FTP Data Transfer To Client, Port = 1636, size 1460
56 3.946 157.57.24.193 157.57.11.169 FTP Data Transfer To Client, Port = 1636, size 1460
57 3.947 157.57.11.169 157.57.24.193 TCP .A...., len:0, seq: 356870796, ack: 349358750, win: 4096,
The window size is also used for flow control. If a host is advertising a smaller window size when its buffers are filling, or a window size of 0 if it can not receive data at all. In frame 50 above, the host is advertising a window size of 8760 and in frame 57 it has been dropped to 4096.
Ports, Connections, and Endpoints
Port numbers define the ultimate destination within a computer. Connections are identified by a pair of endpoints. An Endpoint is the (host, port). Ex. (199.199.40, 21)
Port Numbers
The port numbers are divided into three ranges: the Well-Known Ports,the Registered Ports, and the Dynamic and/or Private Ports. The Well-Known Ports are those from 0 through 1023.The Registered Ports are those from 1024 through 49151. The Dynamic and/or Private Ports are those from 49152 through 65535.
Well-Known Ports are assigned by Internet Assigned Numbers Authority (IANA) and should only be used by System Processes or by programs executed by priviledged users. An example of this type of port is 80/TCP and 80/UDP. These ports are priviledged and reserved for use by the HTTP protocol.
Registered Ports are listed by the IANA and on most systems can be used by ordinary user processes or programs executed by ordinary users. An example of this type of port is 1723/TCP and 1723/UDP. Although these ports can be used by other processes they are generally accepted as the connection control port for Point To Point Tunnelling Protocol (PPTP).
Dynamic or Private Ports can be used by any process or user. They are unrestricted.
IANA maintains a list of ports on their Web site at:
http://www.iana.org/assignments/port-numbers
Microsoft provides third-party contact information to help you find technical support. This contact information may change without notice. Microsoft does not guarantee the accuracy of this third-party contact information.
Trace Reading Suggestions
Follow a session using source and destination IP address and Port numbers. If you find a Reset, focus on the sequence numbers and acks that proceed it. Use a calculator to see what ack is corresponding to what data sent. Newer versions of NetMon will do the calculations for you. Is the sender doing retries? Note the number of retries and the time elapsed. The default number of retries is 5. Is the receiver asking for a missed frame by ACKing a previous sequence number? Did the sender back up and resend the previous packet? A Reset can be caused by time-outs at the TCP layer or by time outs of higher layer protocols. Resets originating at the TCP layer should be easy to read from the trace. It may be more difficult to determine the cause of Resets originating from higher layer protocols.
For example, a Server Message Block (SMB) read may time out in 45 seconds and cause a Reset of the session even though communications are slow but working at the TCP layer. The trace may only narrow down what component is at fault. From there you may need to use other troubleshooting methods to determine the cause.
Wednesday, July 11, 2012
for those with MacBooks and your happy little Apple products:
larger, but off-brand printer manufactures like Samsung do not make a driver for MAC os10.x systems. if you use a generic driver (postscript of IPP) it will just print blank pages.
HP does make MAC drivers, but they often fail. the linux Debian driver (dpkg) installed will trick the system into seeing the MAC driver, install the mac driver first, then the debian. then from printer settings (super button - system settings - printers and faxes) you can then search for the printer and it will automatically assign the driver.
Speaking of printers!!
if you have an HP printer, your aware of the annoying little pop-up every time you print, that blocks the bottom rights side of the screen....well, guess what, i have a little help for you:
larger, but off-brand printer manufactures like Samsung do not make a driver for MAC os10.x systems. if you use a generic driver (postscript of IPP) it will just print blank pages.
HP does make MAC drivers, but they often fail. the linux Debian driver (dpkg) installed will trick the system into seeing the MAC driver, install the mac driver first, then the debian. then from printer settings (super button - system settings - printers and faxes) you can then search for the printer and it will automatically assign the driver.
Speaking of printers!!
if you have an HP printer, your aware of the annoying little pop-up every time you print, that blocks the bottom rights side of the screen....well, guess what, i have a little help for you:
when th pop-up comes up, click settings on the bottom of the window.
uncheck the option to show printer warnings and information.
if that does not work, do the following (this has to be done to each indavidual machine):
Click the "Start" menu and open the Control Panel.
Double click the "Printers and Faxes" icon (in Windows XP) or the "Printers" icon (in Windows Vista or later).
Press the "Alt" key on your keyboard to display the menu bar (Windows Vista users only).
Click the "File" menu and choose the "Server Properties" option.
Open the "Advanced" tab.
Uncheck the box labeled "Notify when remote documents are printed."
Uncheck the box labeled "Show informational notifications for local printers."
Click "OK."
the final solution is to go the properties of the printer (right click the printer, and go to Printer Properties"
then when that window comes up, select the tab "Device Settings"
in that window, there is an option "show printer status" change that to "Disabled"
click "OK" and all is well.
OK that's it for today.
Subscribe to:
Posts (Atom)